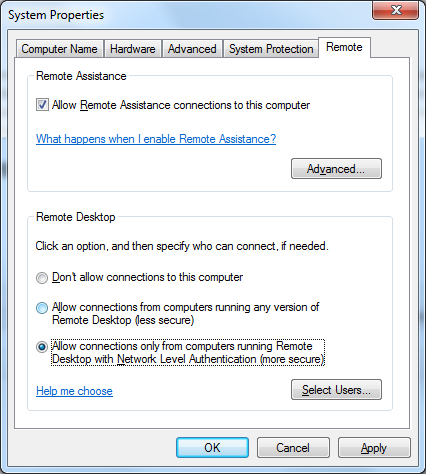
If you like me is a big fan of the Windows feature Remote Desktop, you might find this post interesting. I will tell you how you can change the default port for Remote Desktop making it harder for hackers to attack your computer.
What is Remote Desktop?
Remote Desktop is a great built-in service first introduced in Windows XP. It allows users to remote control Windows to perform all kind of tasks. Because it is a built-in feature, it is also a bit target for hackers. As per default the feature is not active and you are also denied access with users with a blank password. The service is listening for traffic on TCP port 3389 and all hackers know that. That is why they will be looking for firewalls that allow connection on that port using all kinds of port scanners. The best solution to avoid attacks will be to require VPN connections to access a computer behind a firewall. If that is not an option you might want to change the port that Remote Desktop is listening on.
How to change port for Remote Desktop
To change the listening port for remote desktop you will have to make a small change in Windows using the Registry editor (regedit.exe). You will need to navigate to:
Edit the value: PortNumber to the new number you want instead of the default 3389 (e.g. 3390)
The next time you restart your computer it will be listening on the new port and only allow connection on that specific port. If you don’t like to make changes to your computer using regedit, Microsoft have made a small Fix It application that can make the changes for you. All you have to do is to enter the new port number you want to use. To download the Fix It tool, just click on the image below.
Notice: If you are running Windows Firewall on the computer you want to connect to you will have to create a new rule allowing TCP inbound traffic on you new custom port.
How to connect to a Remote Desktop using a custom port
In order to tell your remote desktop client to connect to the new custom port you will have to add the port number after the IP address or name you are connecting to. E.g. 192.168.150.130:3390 Per default the RDP client will always try to connect using port 3389.

I hope that you found this post useful. If you have any questions or something else on your mind please leave me a comment below.


This is a very unique tutorial and this is the first blog where i have seen this tutorial..I would be trying it out on my Windows 7 PC .Thanks for sharing this awesome tutorial with us!.
-Pramod
Whenever I use a Windows machine this is one of the features that I always disable. You won’t be needing remote access unless you are setting up your mom’s computer and she is expecting you to help her remotely. Otherwise this is great info for those who are compelled they have to turn this feature on.
Hi Marck
The good think is that this feature is disabled by default in Windows 7. Security wise this is a good thing and it is very easy to enable if we need it.
Great video! I have used this a couple of times to help people out but not often. It is a useful tool that’s for sure! Thanks for the tutorial it is great for someone who doesn’t know how to use it or what it’s for.
I have never tried to change my default port address but reading your article i will do so for my security purpose. Thank you Thomas for sharing this marvelous article.
Adding firewall exception for customized port still puts it danger isn’t it? Is it possible to create a rule allowing single IP to connect to this specific port?