If you need to move one or more Virtual Machines in Hyper-V, you can do that, using PowerShell.
How to move a Virtual machine using PowerShell
If you need to move one or move virtual servers, you can of cause use the GUI and follow the wizard, but it is also possible using a PowerShell command to do this task. This can come in handy, if you need to move multiple Virtual servers and want to script a solution, that gets the job done. It might also be because you need to move one or more virtual servers and have to do it in a small service window, in the middle of the night. In both cases it can be smart to know, how to do this in PowerShell. It is in fact, not very hard at all. Let us get started.
Use the Move-VMStorage Cmd-let
In this example I want to move one of my Virtual servers, from a slow mechanical hard drive, to a faster SSD drive. Before we start, let’s check out where my current VM’s on my server are located. To get that information I run the following command.
The VM I want to move is the last one named “Windows 10”. It is located at: F:\HYPER-V\Windows10\Virtual Hard Disks\
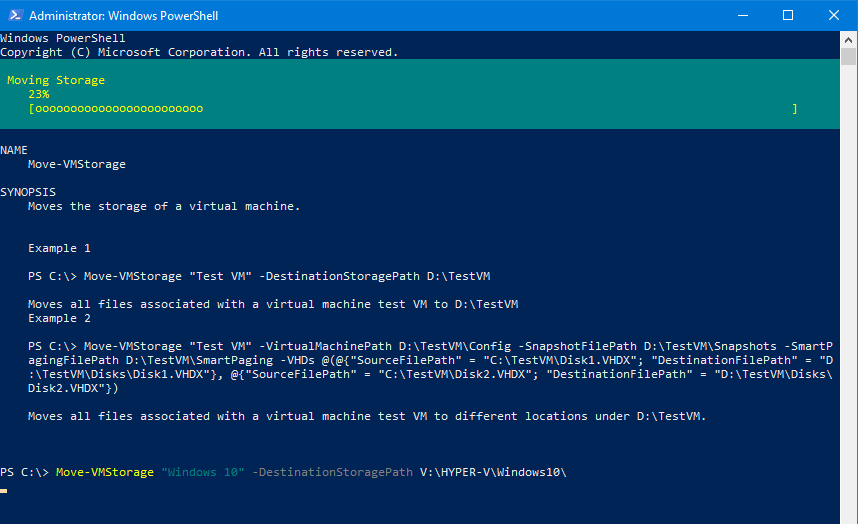
Below you can see the command I used to move my VM named “Windows 10” to the new location: V:\Hyper-V\Windows10\ that is on my fast SSD drive.
Notice, you can see the process in the PowerShell window to see how many percent of the task has been done.
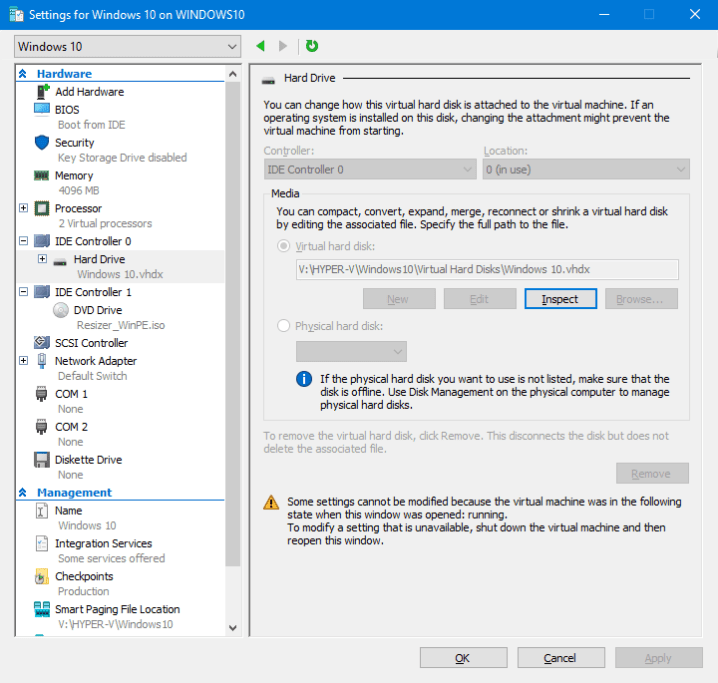
When the process is done, you can go and check in the Hyper-V manager that the disk location also have changed:
That is all it takes, to move a VM in Hyper-V to another location, using a simple PowerShell cmd-let. You can even do this task, while the virtual server is running. Depending on your disk system, users might notice a limited performance while moving servers in business hours. The example above moves both VHDX files, Config file and Snapshot files to the new location. If you want to split these files to multiple drives that is also possible by adding extra parameters to the Move-VMstorage Cmd-let. You can always type: “get-help Move-VMstorage” to get help on this command and check what arguments you can use on the command.
Cleanup old location
Be aware that the script does not delete the folders from the source location. You will have to do that yourself. More information about the Move-VMStorage command-let
Conclusion
Moving a VM’s storage location using PowerShell is not that hard at all. It can be a good way to start the process from a script if you need to move multiple servers to a new storage system. You might even want to run the PowerShell script from a schedule task if you want to. If you are more comfortable to use the Hyper-V manager or other GUI tools that is of cause still possible. Feel free to leave me a question or comment below.


I know this is old, but i did find it useful,
In case you want to mass move Hyper-V
$vms=Get-VMHardDiskDrive -VMName * | select VMname
foreach($vm in $vms){
Move-VMStorage $vm.VmName -DestinationStoragePath “C:HYPER_V”
}
Thank you for your comment Travis. Glad you find it useful.